Platform Setup
This guide walks you through setting up Convoy from sign-up to your first live test.Sign up
Go to app.convoylabs.com and create your account. This creates your organization — all agents, tests, and team members live under it.
Create an agent
An agent represents one testable endpoint — a model, prompt, workflow, or any unit you want to roll out.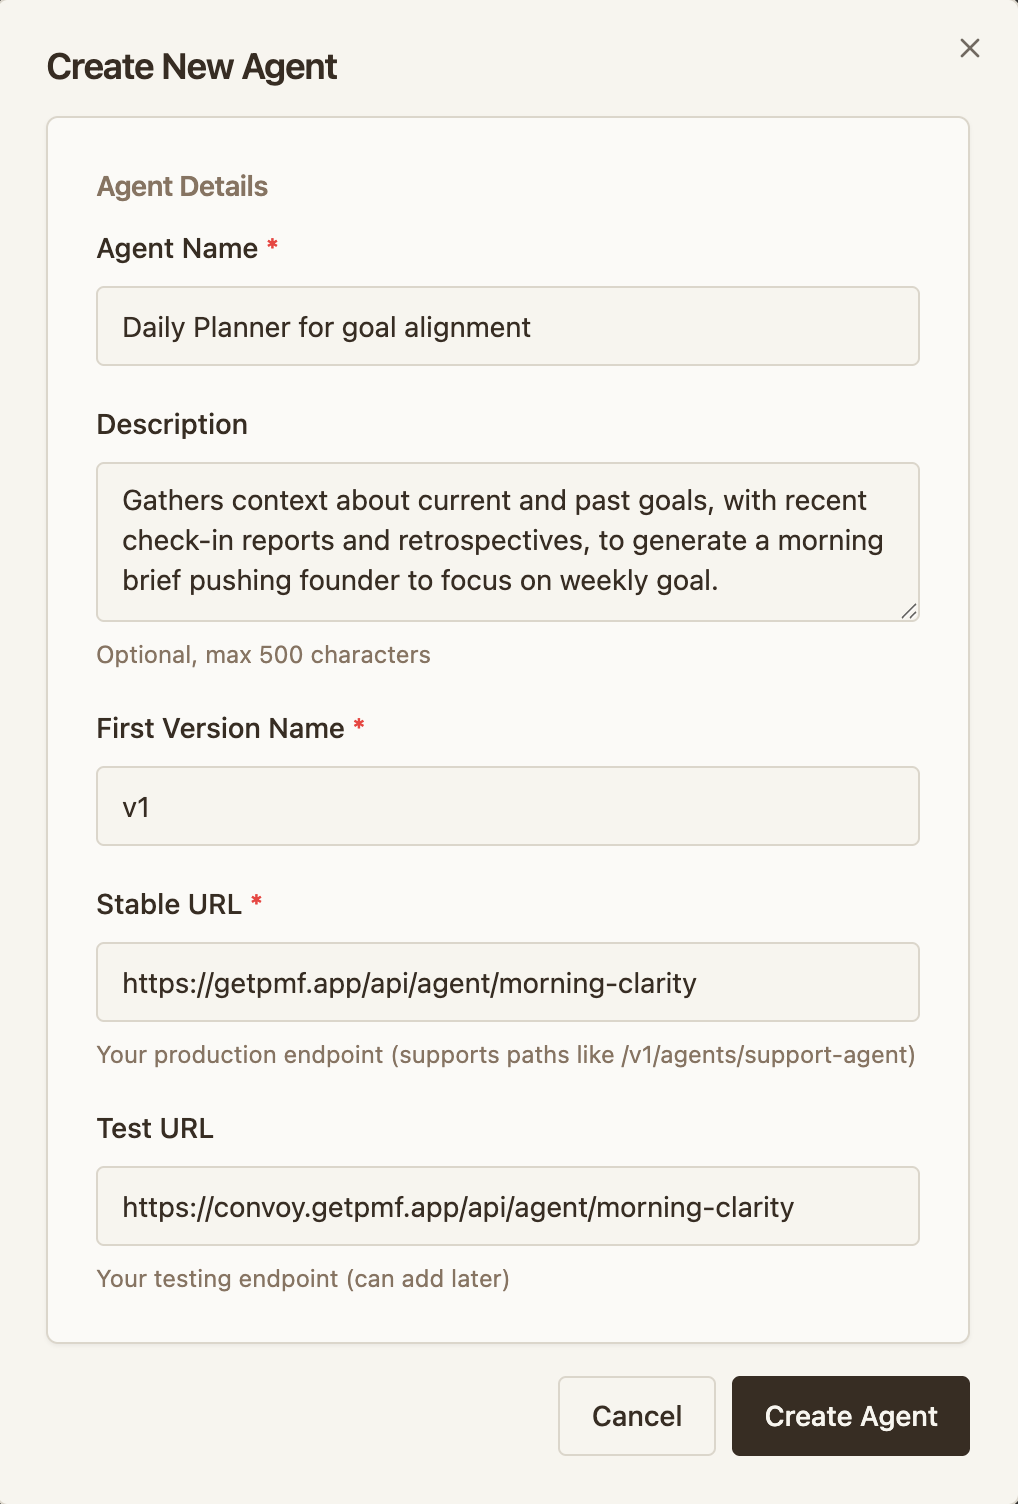
- Click Create Agent
- Configure your two environments:
- Stable URL — your current production backend (e.g.
https://api.acme.com/agent) - Testing URL — the environment running your new version (e.g.
https://api-test.acme.com/agent)
- Stable URL — your current production backend (e.g.
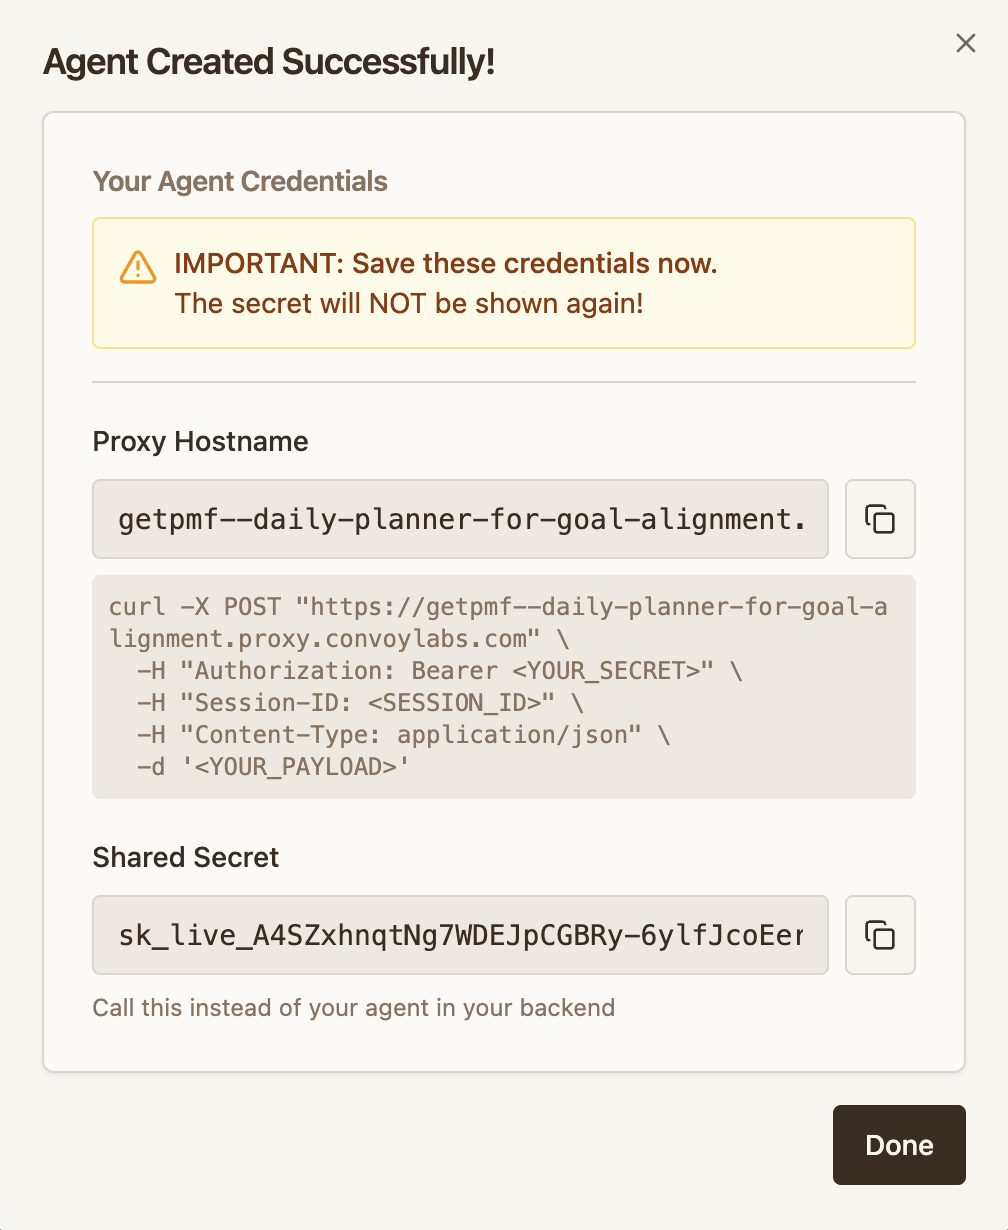
- Convoy generates two values you need for integration:
- Proxy URL — where your client sends requests (e.g.
acme--chatbot.proxy.convoylabs.com) - Shared secret — used by the client as a bearer token and by the agent for signature verification
- Proxy URL — where your client sends requests (e.g.
Client Integration
Point your client at the proxy URL and pass the shared secret.
Agent Integration
Verify Convoy’s signature and report metrics from your agent backend.
Deploy a test
Once integrated and both environments are live, deploy a test to start routing traffic to the new version.
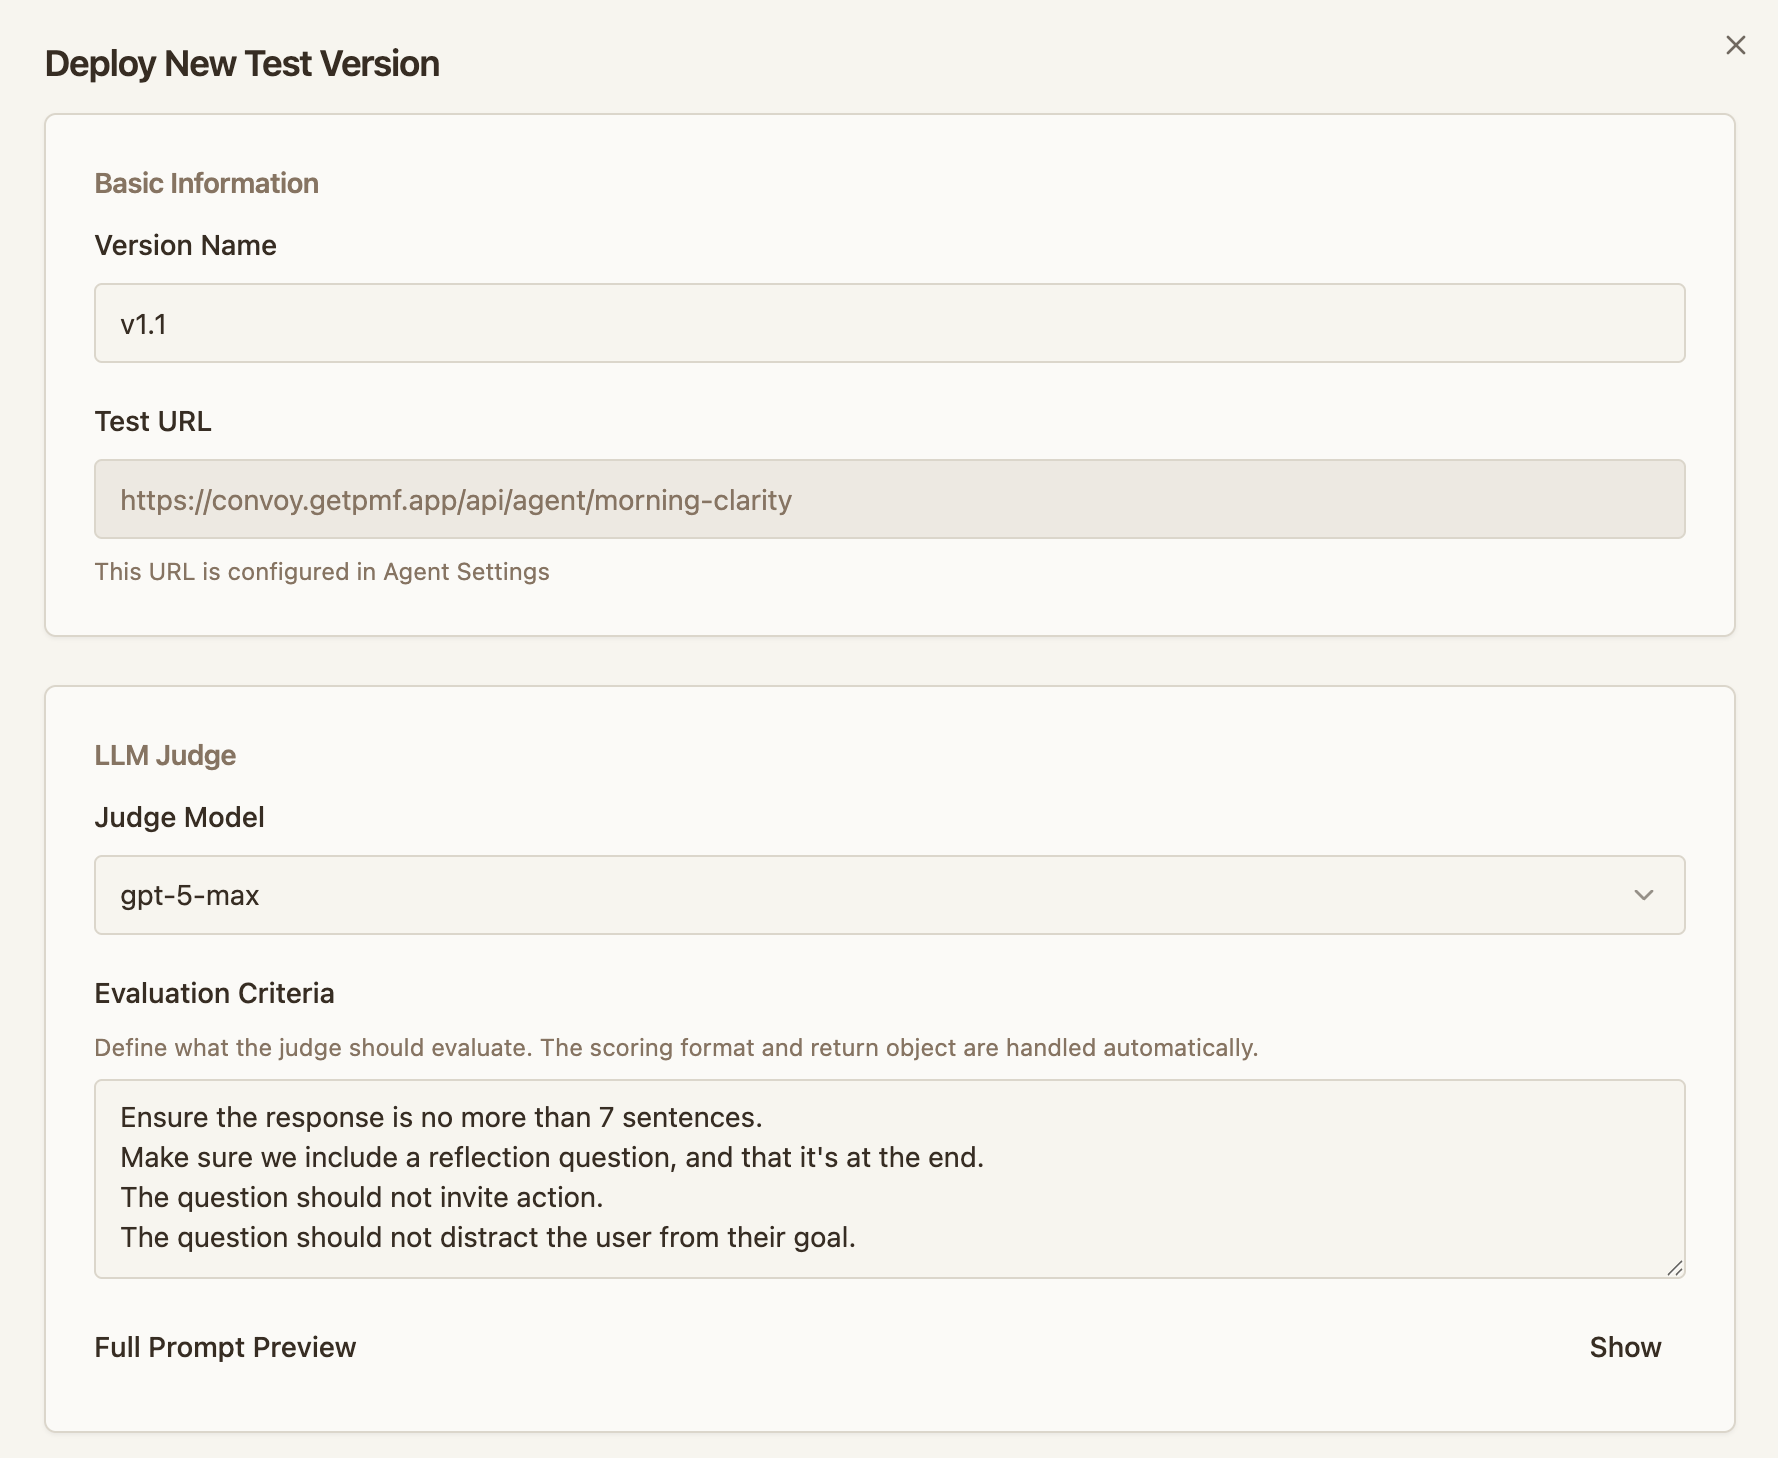
- Open your agent and click Deploy Test
-
Configure the judge:
- Judge model — the LLM that evaluates each session
- Judge prompt — describes what to evaluate for your specific change. The judge receives each session’s
inputandoutput(reported via the session ingest endpoint) and scores it. The judge doesn’t see your agent’s system prompt, tools, or any other context — include whatever it needs to evaluate in the judge prompt itself.
-
Set thresholds that control automatic decisions:
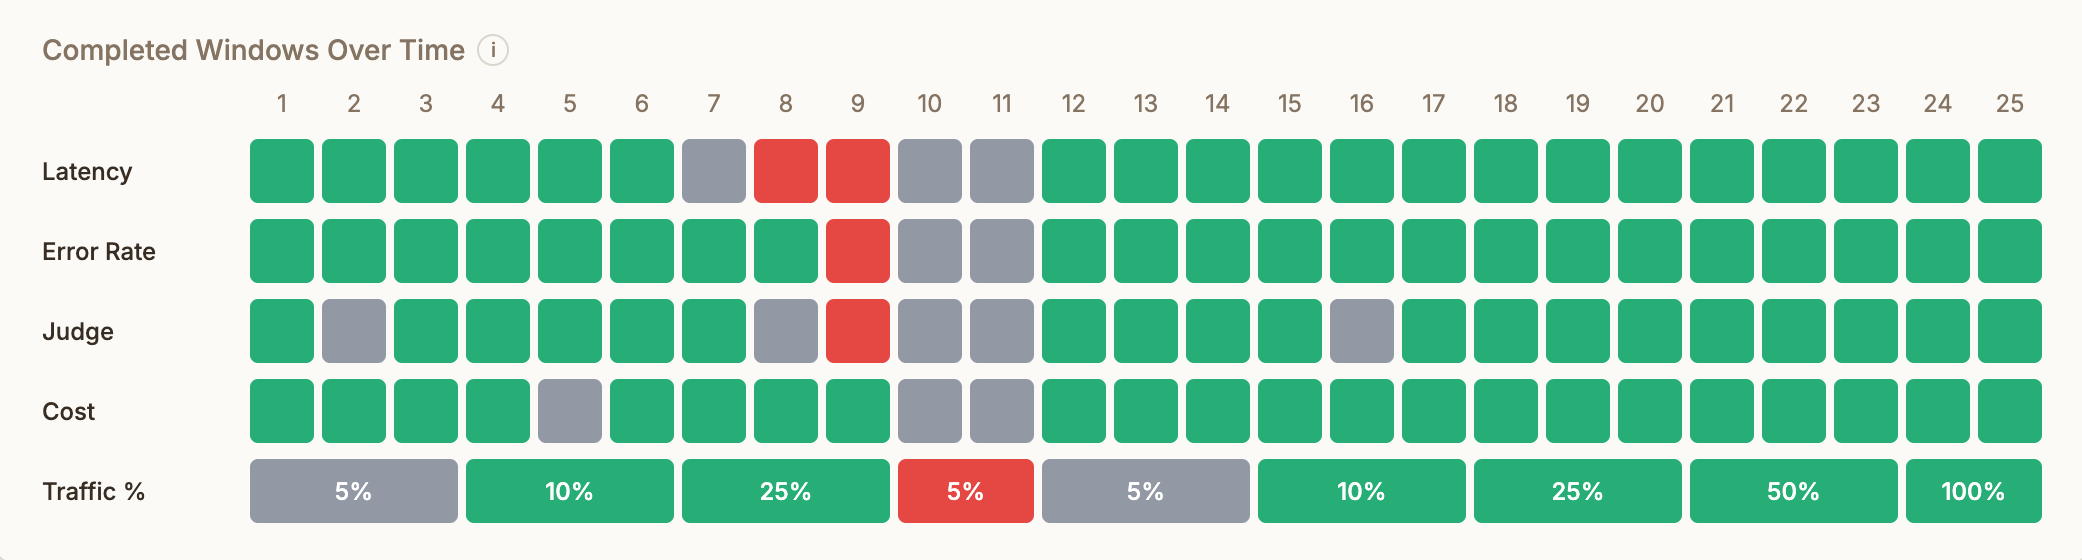
- Promote — when the test version meets this bar, Convoy increases its traffic share
- Rollback — when the test version falls below this bar, Convoy cancels the test and sends all traffic back to stable
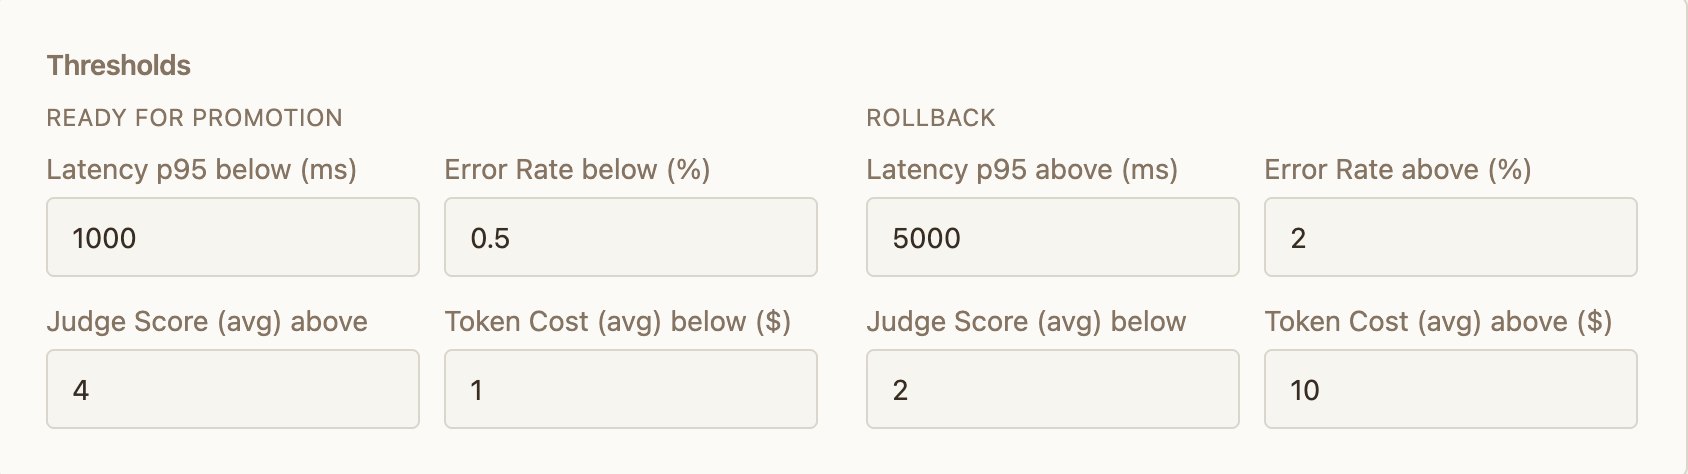
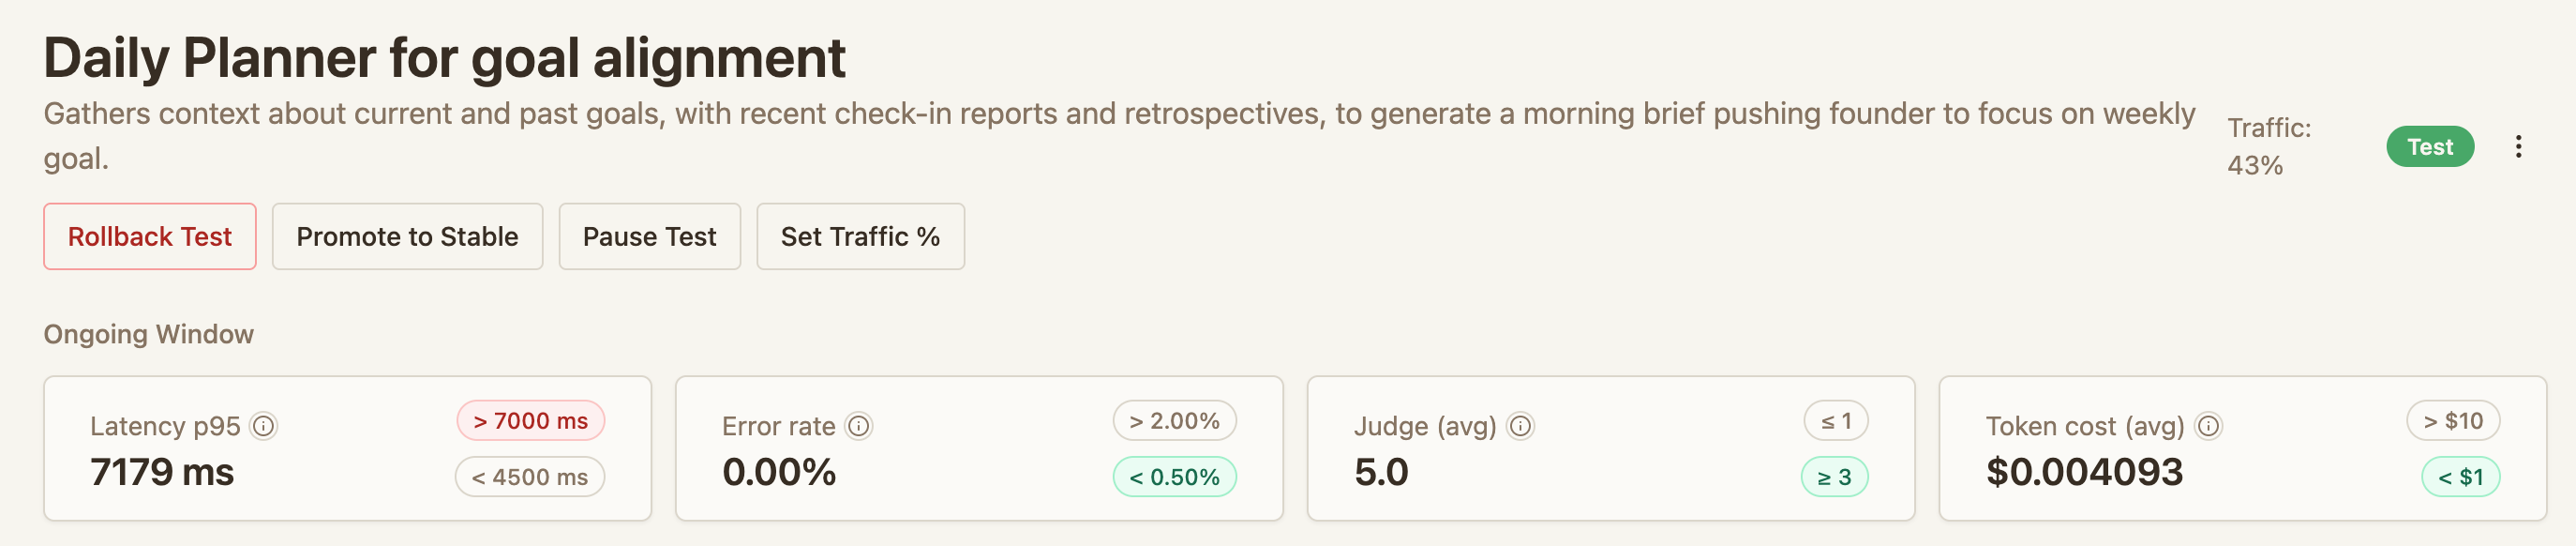
Thresholds are evaluated against the metrics your agent reports via the session ingest endpoint — latency, error rate, cost, and judge scores. If your agent doesn’t report a metric, its threshold can’t be evaluated. For multi-step sessions, latency and cost are summed across all steps to produce session totals.
Monitor and act
After deploying, the agent page is your control center:
- Rollout status — current traffic split, session counts, and judge scores
- Pause — freeze the traffic split to investigate
- Modify traffic — manually adjust the percentage going to the test version
- Roll back — cancel the test and send all new sessions to stable
-
Promote — mark the test as the new stable. Merge your changes in your codebase, deploy to your stable environment, then promote on Convoy to route all traffic to stable